Lab C: SLAM
Today's Lab
- Mapping an environment using built-in ROS2 SLAM methods, and loading the saved map
- Watch SLAM running in real-time
- Record a map of the maze for your particle filter localization project
Mapping Environments Using SLAM
Please work with your particle filter project partner during today's lab.
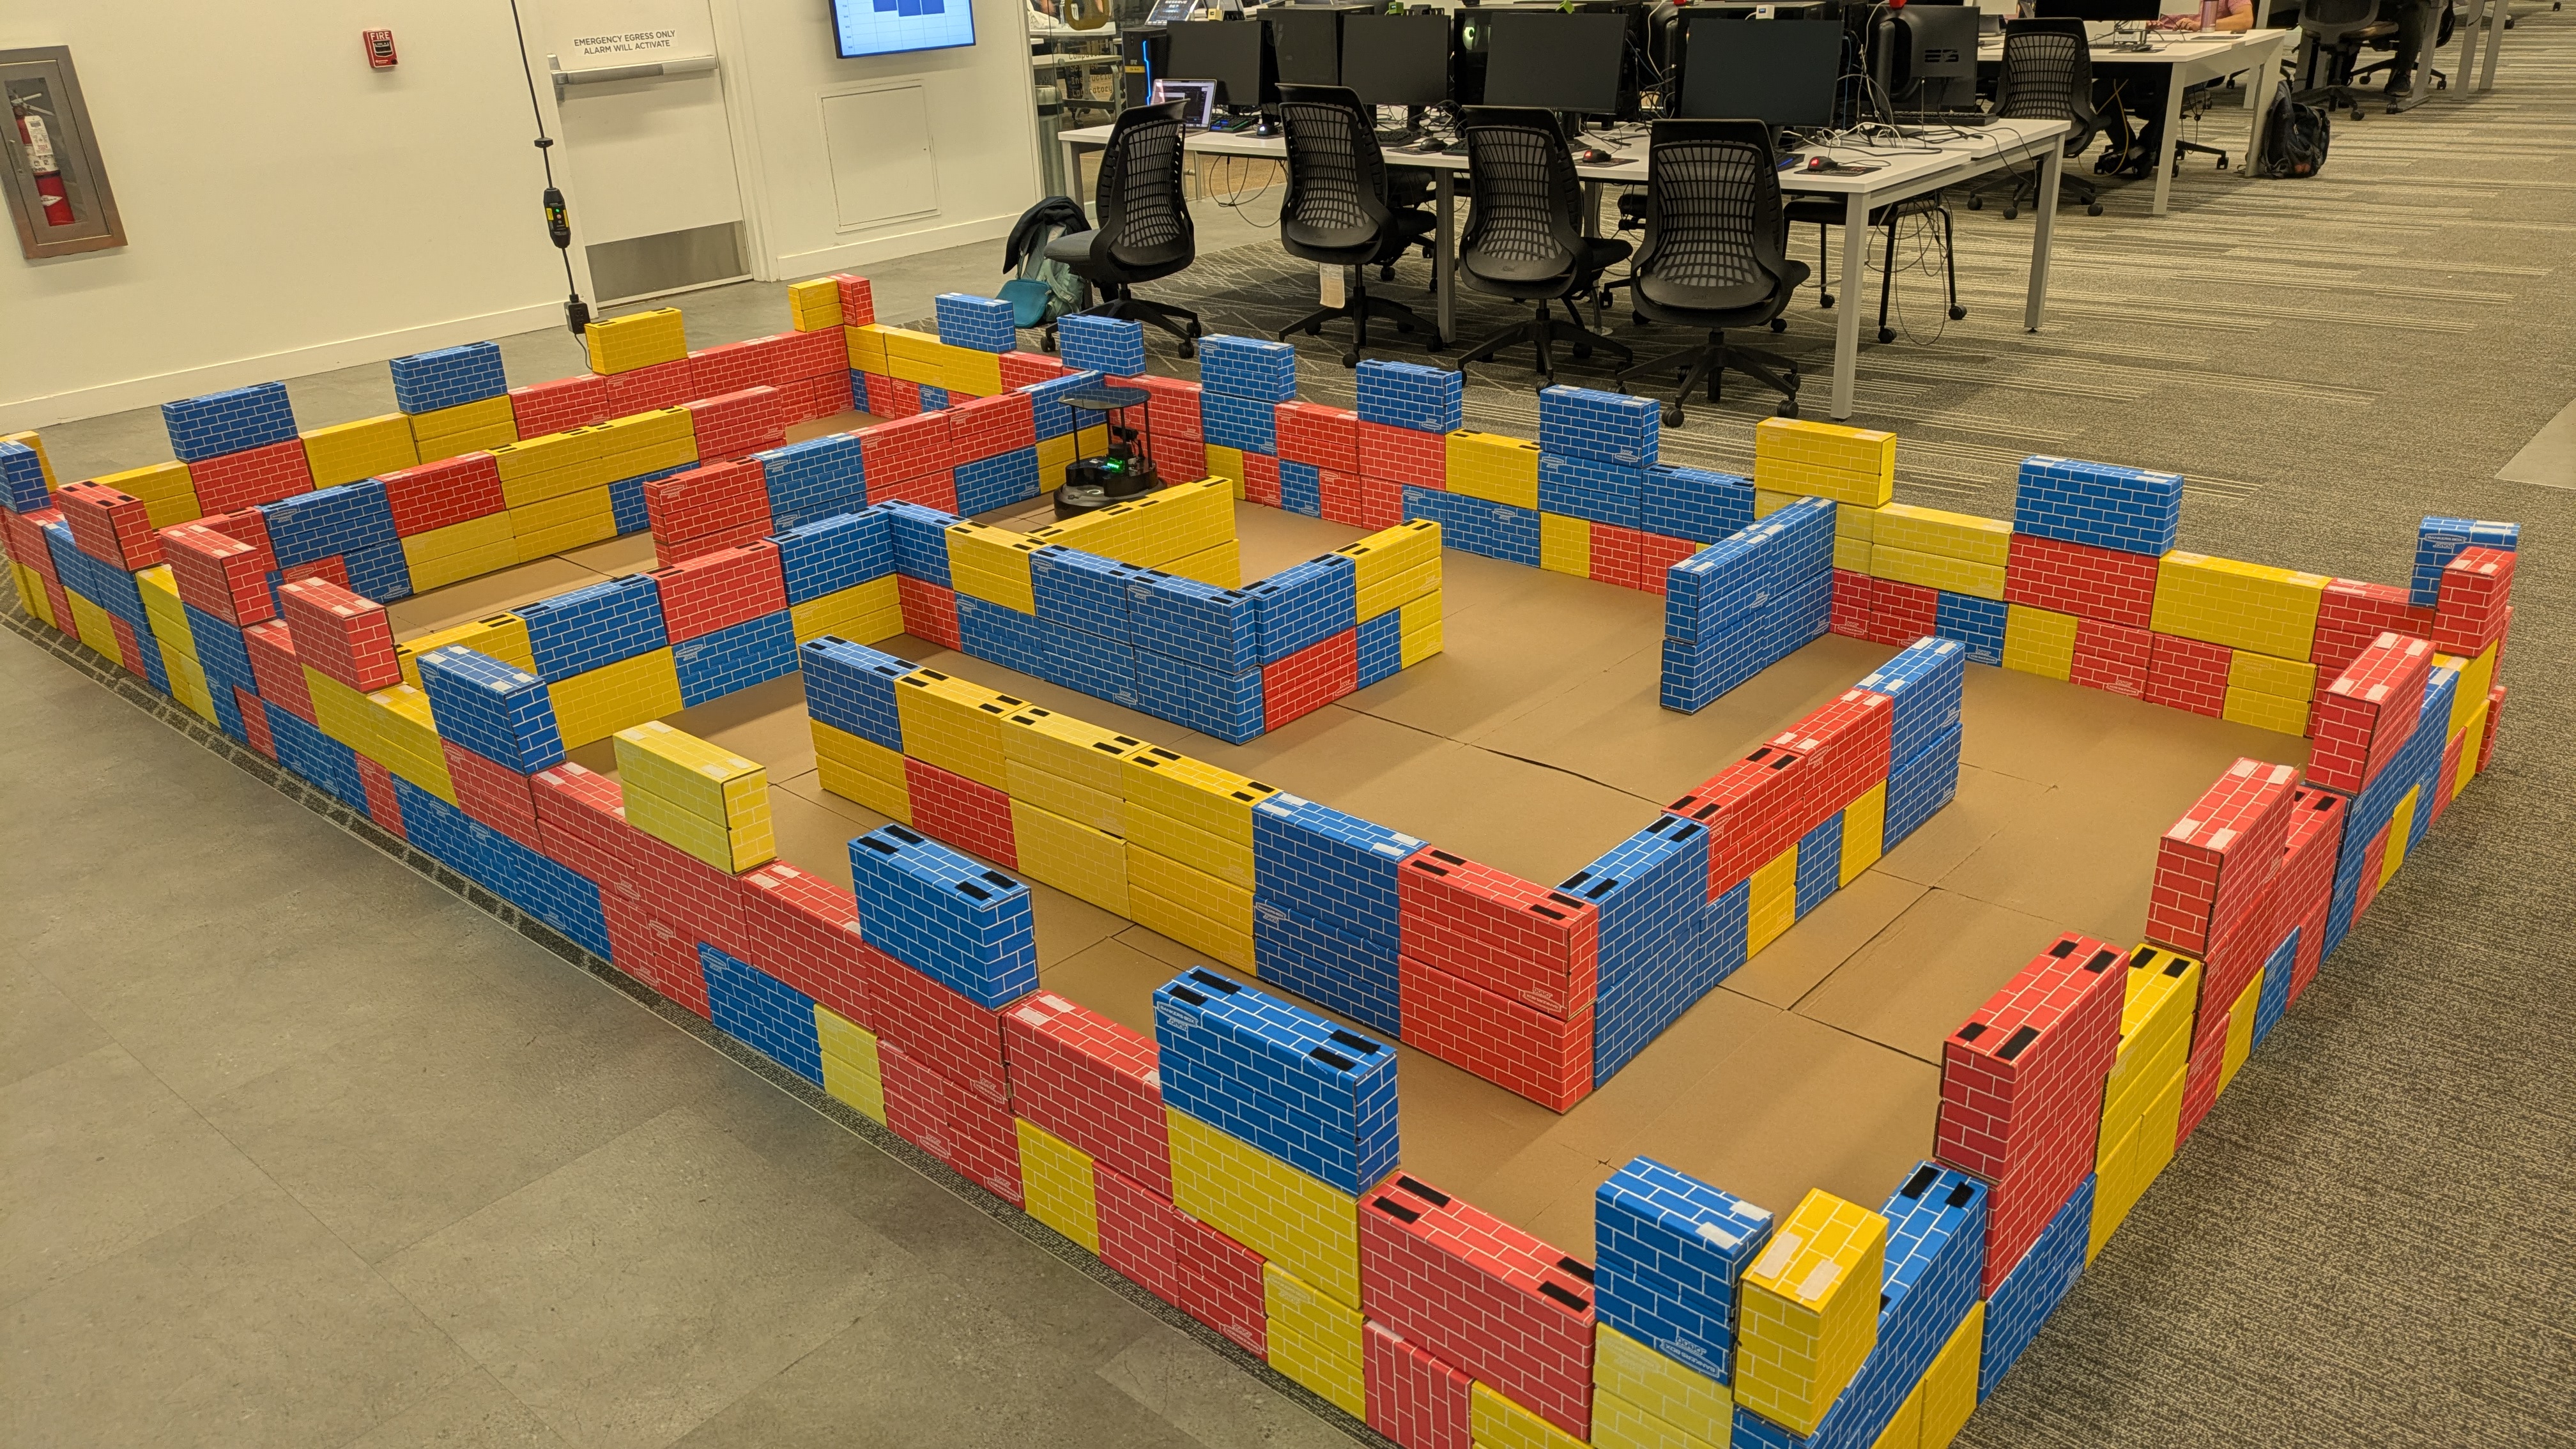
In this exercise, you will (1) use SLAM to generate a map of the maze we've built for the Turtlebot4 (shown below), and (2) save & load the map - visualizing it in RViz.
Setup
To start out today's lab, you'll want to have set up your particle filter project ROS2 package (if you haven't already). This involves:
- Accepting the GitHub classroom invitation (found on the Canvas particle filter project assignment)
- Cloning your repository within the
~/intro_robo_ws/srcdirectory - Re-building your workspace and sourcing the
install/setup.bashfile:$ cd ~/intro_robo_ws $ colcon build --symlink-install --packages-select particle_filter_project $ source install/setup.bash
To ensure that you're saving your map files in the right place, create a new maps directory at the full path:
~/intro_robo_ws/src/particle_filter_project/mapsUsing SLAM to Create a Map of Your Environment
The Turtlebot4 ROS2 packages have nodes that can perform SLAM and output a map of an environment that the Turtlebot4 navigates. You can follow these links to find more information on generating a map using SLAM and Turtlebot4 navigation
Now, let's run SLAM and generate a map of your Turtlebot4's environment. Do this by executing the following:
-
Terminal 1: Launch SLAM - be sure to change the namespace to match your Turtlebot4's number
$ ros2 launch turtlebot4_navigation slam.launch.py namespace:=/tb05 -
Terminal 2: Visualize the Map and Robot - remember again to change the namespace to match your Turtlebot4's number
$ ros2 launch turtlebot4_viz view_robot.launch.py namespace:=/tb05Note: If map doesn't show up on the grid in RViz as you're recording it, you can try changing theFixed Framein RViz'sGlobal Optionsfrommaptobase_link. - Terminal 3: Teleoperate the Robot - follow the Turtlebot4 teleoperation instructions to use either your keyboard or the remote contoller to move your Turtlebot4 around the environment.
-
Terminal 4: Save Your Map - only run this command after you've fully explored the environment and generated a complete map, change the namespace to match your Turtlebot4's number, and noting that you'll be naming the map
maze_map- the map name expected for your particle filter project
Please note, if you did not run this command from the$ ros2 run nav2_map_server map_saver_cli -f "maze_map" --ros-args -p map_subscribe_transient_local:=true -r __ns:=/tb05~/intro_robo_ws/src/particle_filter_project/mapsdirectory, you'll need to move your map files to that directory in order to allow your ROS2 package to access the map when visualizing it.
Difficulties Recording the Whole Maze: One thing we've noticed while trying to record a map of the entire maze is that the SLAM algorithm often has a tough time recording the last 10-20% of the maze. If you find that you're having trouble recording the whole maze, try recording a map of one half of the maze. You can then use this partial map for your particle filter localization project.
Here's an example of what you should see in RViz when you're generating your map (my computer was lagging a bit during the recording of this gif, yours should look a bit more continuous):


Loading a Saved Map
To load a map that you've saved and visualize it in RViz, you'll need to:
-
Map names and location: Make sure that the map you want to visualize is named
maze_mapand that both themaze_map.yamlandmaze_map.pgmfiles are in the~/intro_robo_ws/src/particle_filter_project/mapsdirectory. -
Build your colcon workspace: When you add a new map file to your ROS2 package, you'll need to re-build your colcon workspace and source the
install/setup.bashfile again so that ROS2 can find the new map files.$ cd ~/intro_robo_ws $ colcon build --symlink-install --packages-select particle_filter_project $ source install/setup.bash -
Launch the map in RViz: To visualize your saved map in RViz, you'll need to to launch the
visualize_particles_launch.pyfile that we've created that comes with your particle filter project ROS2 starter code package. This launch file will launch RViz and the map server node that will load your saved map. You can run this command in a new terminal window:ros2 launch particle_filter_project visualize_particles_launch.py

Further SLAM Learning Materials
If you're interested in learning more about SLAM, feel free to check out:
- Krunal Kshirsagar's blog post on Figure SLAM: Guide to simultaneous localization and mapping of Noob
- Grisetti et al. (2010) A Tutorial on Graph-Based SLAM
- Sebastian Thrun's Graph SLAM 4 minute video
- A Columbia University SLAM tutorial slide deck
Particle Filter Project Work Time + Maze Recording
Once you've finished having fun exploring the built-in SLAM Turtlebot4 ROS2 packages, please use the rest of class time to work on your particle filter localization project with your project partner.
For your particle filter localization project, one thing you will need is a map of the maze. Use time in lab today to record a map of the maze for your project. Only one team can record a map of the maze at a time, so please wait your turn and work on other aspects of the project while you're waiting.